


Table of Contents
- Why non-slip rug pads matter for hardwood floors
- Felt vs. rubber: Which material protects your floors better
- How to stop rugs sliding on wood floors
- Protecting hardwood floors from rug backing damage
- Choosing the right thickness and density
- Installation, trimming, and maintenance
- Conclusion
- Frequently Asked Questions
Last Updated: September 29, 2026
Why non-slip rug pads matter for hardwood floors
Non-slip rug pads for hardwood floors prevent rugs from bunching, sliding, and damaging wood surfaces by creating a protective barrier that reduces discoloration, scratches, and finish degradation.
Without proper protection, rug backing can leave permanent marks or stains on hardwood, while shifting rugs create tripping hazards and wear unevenly.
The right non-slip rug pad anchors your rug, cushions footsteps, reduces noise, and shields hardwood from damage. This guide covers material selection, installation, and maintenance.
Felt vs. rubber: Which material protects your floors better
Felt and rubber are the two primary rug pad materials, each with distinct advantages for hardwood protection.
Felt rug pads are made from natural or synthetic fibres and offer excellent grip and cushioning. They're gentler on hardwood with minimal chemical content and good breathability, producing negligible VOCs. However, felt can absorb moisture and compress over time, typically lasting 3-5 years before effectiveness diminishes.
Rubber rug pads provide superior grip and durability, resisting compression for 7-10 years. Natural rubber is more environmentally friendly and safer for hardwood than synthetic alternatives.
Synthetic rubber pads often contain plasticizers that can leach into wood finishes when moisture is trapped, causing permanent yellowing or discoloration, especially on newly finished floors with water-based polyurethane.
Natural rubber pads carry far less risk but cost more. If choosing synthetic rubber, select pads labelled "plasticizer-free" or "non-PVC" and verify the product specification sheet.
Synthetic rubber pads may off-gas formaldehyde, particularly in bedrooms or nurseries with limited ventilation.
- For newly finished hardwood (within 30 days): Use felt pads exclusively. Avoid all rubber pads until the polyurethane has fully cured and hardened.
- For established hardwood with water-based polyurethane finish: Use natural rubber pads or plasticizer-free synthetic alternatives. Felt is acceptable but offers less durability.
- For hardwood with oil-based polyurethane finish: Both felt and rubber are safe; oil-based finishes are less reactive to plasticizers. Choose based on comfort and grip preferences.
- For high-traffic areas where grip is paramount: Natural rubber or high-density felt. Avoid cheap synthetic rubber pads with unknown chemical composition.
- For bedrooms, nurseries, or chemically sensitive households: Felt pads or certified natural rubber pads with low VOC emissions.
How to stop rugs sliding on wood floors
Non-slip rug pads for hardwood create grip as their primary function. Rugs slide on hardwood's smooth finish, so a quality pad creates traction through its textured surface.
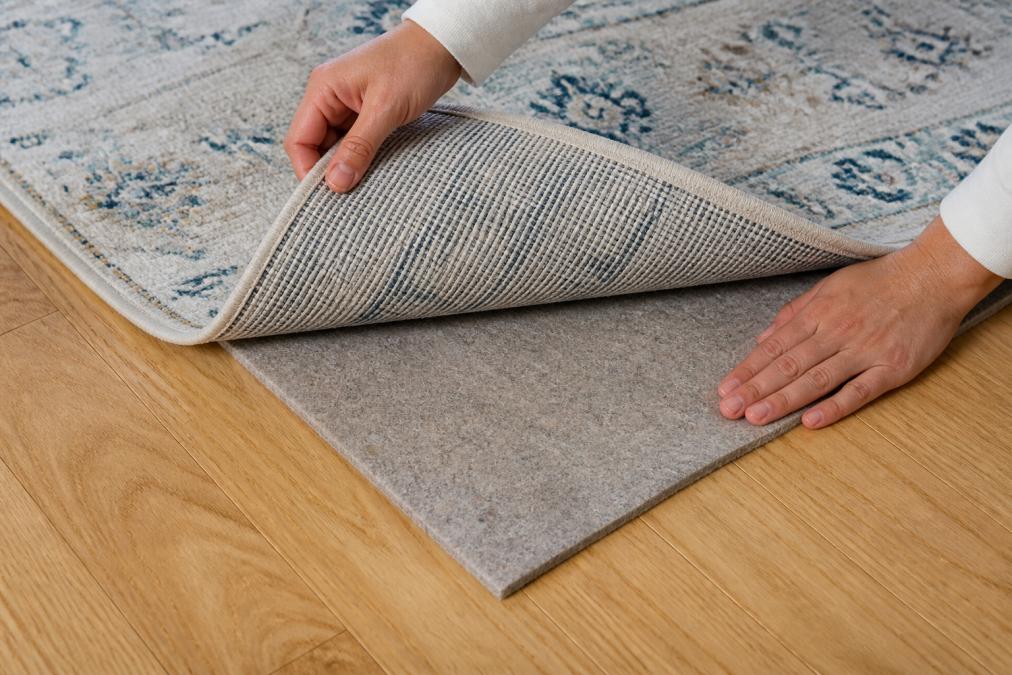
Protecting hardwood floors from rug backing damage
Rug backing materials vary widely, and when in direct contact with hardwood, can transfer dyes, moisture, and oils that permanently stain or discolour the finish.
Choosing the right thickness and density
Rug pad thickness ranges from very thin to very thick. Thickness affects both comfort and floor protection.
| Pad Thickness | Best Use | Comfort Level | Floor Protection |
|---|---|---|---|
| Very thin | Formal rooms, low-traffic areas | Minimal | Basic |
| Thin to moderate | Living rooms, bedrooms, general use | Moderate | Good |
| Moderate to thick | Kitchens, hallways, high-traffic zones | High | Excellent |
Installation, trimming, and maintenance
Vacuum the hardwood floor thoroughly before installation; particles trapped under the pad can damage the finish and reduce grip.
Step-by-step installation:
- Prepare the floor. Vacuum thoroughly and wipe with a dry cloth.
- Position the pad. Lay it so it extends a short distance beyond the rug's edges to prevent rug backing from contacting hardwood.
- Place the rug. Press down firmly from centre outward to eliminate air pockets.
- Check for wrinkles. Smooth any creases; wrinkles reduce grip and create tripping hazards.
Trimming trim-to-fit pads for odd-shaped rugs:
For rectangular and square rugs:
- Use a sharp utility knife and a metal straightedge for clean, even cuts.
- Measure the rug's dimensions carefully, accounting for any fringe or tassels.
- Trim the pad so it sits a short distance inside the rug's edge. This prevents the pad from showing at the perimeter and ensures the rug backing remains fully protected.
- Make one smooth, continuous cut rather than multiple passes; multiple passes create jagged edges that can catch or unravel.
For runner rugs and hallway installations:
- Measure the runner's length and width, including any tassels.
- Trim the pad to match the runner's dimensions exactly, or leave it slightly shorter on all sides to prevent the pad from protruding.
- For long runners, consider using two pads placed end-to-end rather than one long pad. This reduces the risk of bunching in the middle and allows easier repositioning if needed.
- Ensure the pad does not extend beyond the runner's edges on stairs; this creates a tripping hazard.
For L-shaped, circular, or custom-cut rugs:
- Trace the rug's outline onto the pad using a marker or chalk.
- Cut slowly and carefully, following the outline. For curves, use a utility knife with short, controlled strokes rather than trying to cut in one motion.
- Test-fit the trimmed pad under the rug before finalising. If it bunches or creates wrinkles, trim slightly more from the problem area.
- For circular rugs, trim the pad into a circle slightly smaller than the rug to prevent visible edges.
Common trimming mistakes to avoid:
- Cutting the pad too large causes bunching and reduces grip.
- Using dull blades tears material and creates rough edges.
- Leaving the pad larger than the rug defeats protection and is visible.
- Trimming asymmetrically creates visible gaps and uneven protection.
Maintenance:
What to look for during inspection:
- Compression: If the pad has compressed significantly (more than 25% of its original thickness), it is time to replace it. A compressed pad loses its grip and protective properties.
- Discoloration or staining: Dark spots or stains indicate moisture accumulation or mould growth. This requires immediate attention.
- Odours: A musty or mouldy smell indicates trapped moisture. Remove the rug immediately, dry the pad and floor thoroughly, and investigate the source of the moisture.
- Deterioration: Check for tears, crumbling edges, or material breakdown, particularly in high-traffic areas.
In damp climates or moisture-prone areas:
- Lift the rug occasionally (weekly or bi-weekly) to allow the pad and floor to air dry.
- Ensure the room has adequate ventilation; use a dehumidifier if necessary to keep humidity below 50%.
- If you notice any moisture under the rug, remove it immediately and allow both the pad and floor to dry completely before replacing the rug.
- Consider placing a moisture barrier (such as plastic sheeting) under the pad only in basements or areas with known moisture issues. In normal conditions, this can trap too much moisture and cause other problems.
Replacing the pad:
Conclusion
Non-slip rug pads for hardwood floors are a straightforward investment that protects your flooring, improves safety, and extends your rug's life. The choice between felt and rubber depends on your priorities, felt for breathability and gentleness, rubber for superior grip and durability. Thickness and density should match your space's traffic level and comfort needs.
Frequently Asked Questions
What type of non-slip rug pad is best for hardwood floors?
Felt-backed pads are generally best for hardwood floors because they provide cushioning and breathability whilst minimising the risk of discoloration. Natural rubber pads offer excellent grip and skid-resistance but require careful monitoring to prevent moisture trapping. The choice depends on your priorities: felt prioritises floor protection, whilst rubber prioritises traction and grip. For high-traffic areas, a combination approach or premium synthetic latex may offer the best balance of non-slip performance and floor safety.
How do I choose the right size rug pad for my floor?
Measure your rug dimensions and select a pad slightly smaller, typically 5-10 cm shorter on all sides. This prevents the pad edges from showing and ensures proper grip without bunching. For trim-to-fit pads, cut them carefully using a sharp knife or scissors to match your rug's exact outline. Undersizing slightly prevents moisture accumulation at the edges, which is crucial for hardwood protection. Always test fit before securing to ensure the pad sits flat and provides even support across the entire rug.
Do rug pads damage hardwood floors over time?
Low-quality pads can cause discoloration, staining, or surface damage, particularly those with high VOC emissions or poor breathability. Felt pads minimise this risk by allowing air circulation, whilst rubber pads require regular inspection to prevent moisture trapping underneath. Chemical reactions between certain rug backing materials and floor finishes can occur if moisture is trapped. Using a quality non-slip pad with proper breathability, maintaining regular vacuuming to prevent dirt accumulation, and ensuring the pad doesn't trap moisture will protect your hardwood floors effectively.
Should I use a rug pad on every hardwood floor area rug?
Yes, a quality non-slip rug pad is recommended for all area rugs on hardwood floors. Pads prevent bunching, reduce traction hazards, provide sound absorption, and offer insulation benefits. They also protect your floor finish from rug backing materials and reduce the risk of discoloration. Even lightweight rugs benefit from pads because they improve safety and comfort. The only exception might be very temporary rugs, but for any rug you plan to keep in place, an underlayment is a worthwhile investment in both floor protection and household safety.