


































![1+1 FREE | FineSlice™ - Cuts What Scissors Can’t [Offer Ends Today]](http://quanolo.com/cdn/shop/files/d210079baefb8baec1578f1fec4170f982c0ff80d45b958c27cedc5cde9018c7-500.gif?crop=center&height=475&v=1745786035&width=475)












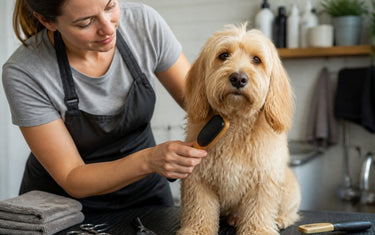
Table of Contents
- What You Need to Groom a Dog at Home
- Step 1: Brush and Detangle Your Dog's Coat
- Step 2: Bathe and Dry Your Dog Properly
- How to Trim Dog Nails Safely
- Step 4: Clean Ears, Eyes, and Paws
- Dog Grooming Frequency by Breed
- Common Mistakes and How to Avoid Them
- Frequently Asked Questions
Last Updated: September 8, 2026
Grooming your dog at home saves money and strengthens your bond, but most owners make it harder than it needs to be by rushing or using the wrong tools. Learning how to groom a dog at home properly comes down to preparation, patience, and the right equipment. This Quanolo guide covers brushing, bathing, nail care, ear cleaning, and breed-specific needs, and flags the mistakes that turn grooming into a battle.
What You Need to Groom a Dog at Home
Gather everything in one place before you begin. A grooming table is helpful but not essential; a non-slip bath mat works fine for smaller dogs. Essentials include a slicker brush, pin brush, metal comb, blunt-ended shears, dog-safe shampoo and conditioner, cotton wool, nail clippers, and treats. For heavy shedders, a deshedding tool makes a noticeable difference.
Step 1: Brush and Detangle Your Dog's Coat
Brushing removes dirt, distributes natural oils, and prevents painful mats. Start with a slicker brush for tangles, then a pin brush to smooth. For long-haired dogs, hold the fur at the root to avoid pulling the skin. Work in small sections from head to tail, focusing behind the ears and under the legs. For stubborn knots, apply detangling spray and ease apart with fingers before combing. Never yank a mat, as this can tear skin and create fear. Keep a calm rhythm with frequent treat rewards.
Best Pet Grooming Brushes for Shedding
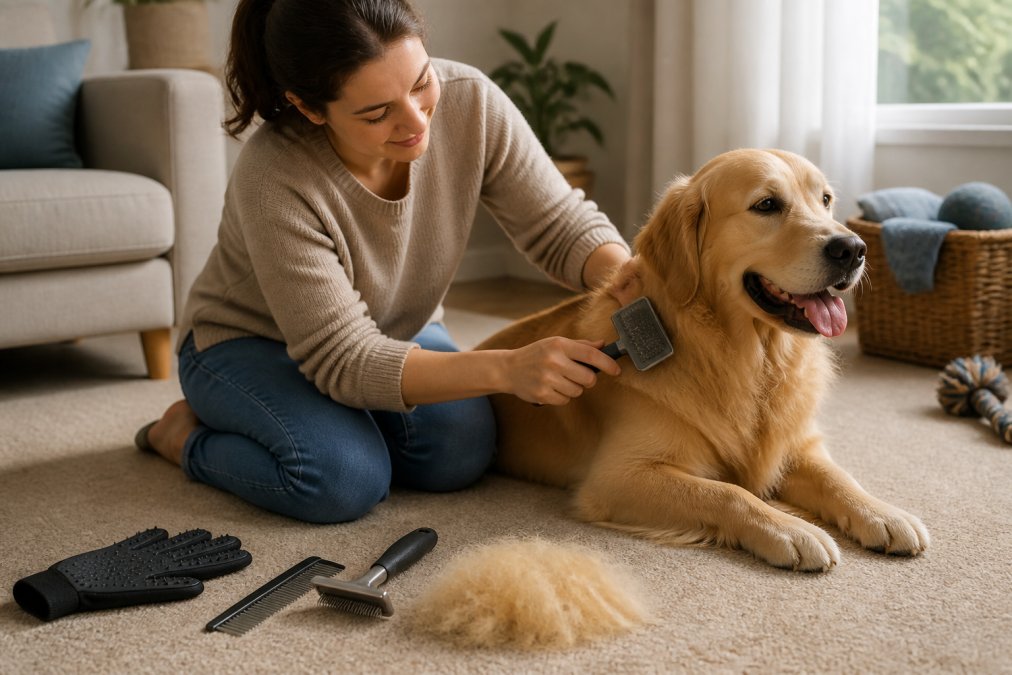
Heavy shedders need tools that capture loose undercoat before it lands on furniture. The Quanolo Pups Furry Dog Brush is a 3-in-1 steam brush combining gentle brushing with a cooling mist that softens the coat and eases detangling, especially for double-coated breeds. The FreshGroom Pet Comb removes tangles and loose hair while massaging the skin, and its water mist reduces static. Hair removal gloves suit short-haired coats, lifting ingrained fur from fabrics and skin in minutes.

| Brush | Best For | Key Feature | Price |
|---|---|---|---|
| Pups Furry Dog Brush | Shedding, tangles, anxious dogs | 3-in-1 steam mist | £36.95 |
| FreshGroom Pet Comb | Long and short coats | 4-in-1 with water mist | £21.95 |
| Hair Removal Gloves | Short coats, furniture | Lifts ingrained fur | £13.59 |
Step 2: Bathe and Dry Your Dog Properly
Bathing is where most home groomers err, usually by using wrong products or rushing the rinse. The goal is to clean without stripping natural oils or leaving residue that causes itching.
Before the Bath: Preparation and Safety
Brush thoroughly first; a wet mat tightens and often requires shaving. Place a non-slip mat in the tub, slippery surfaces cause bath-time anxiety. Keep supplies within reach: dog shampoo, conditioner, a cup or sprayer, and towels. Test water on your inner wrist; it should feel lukewarm, roughly 37-38°C, never hot, as dogs' skin burns more easily.
Choosing the Right Shampoo
Use a shampoo formulated for dogs. Canine skin has a pH between 5.5 and 7.5, whereas human skin is more acidic, so human shampoos disrupt the protective acid mantle and leave dogs prone to dryness and irritation. For dogs with sensitive skin or conditions like eczema, look for oatmeal-based or hypoallergenic formulas. Medicated shampoos for fungal or bacterial issues should only be used under veterinary guidance. Avoid flea shampoos unless you have confirmed fleas, they are harsh and unnecessary as a preventative.
The Washing Process
Wet the coat from the neck down, avoiding the head; use a damp flannel for the muzzle and eyes. Lather shampoo in your hands, then work from neck to tail, massaging into the skin, especially the belly, armpits, and paws. For double-coated breeds, work lather down to the skin rather than just the topcoat, a common mistake that leaves the undercoat unwashed and prone to odour.
Rinsing is the most critical step; residue causes post-bath itching and flaking. Rinse thoroughly until no slippery residue remains. For long-haired breeds, apply conditioner to mid-lengths and ends, avoiding roots, leave for the specified time, then rinse completely.
Drying: Towels, Dryers, and Air Drying
Drying is not optional; a damp coat can cause skin irritation and, in humid conditions, bacterial or fungal growth. Squeeze excess water with your hands, then wrap your dog in an absorbent towel and pat, do not rub, as rubbing creates tangles. Double-coated breeds may need a second towel for the undercoat.
For finishing, use a hairdryer on low, cool or warm, introduced gradually. Hold it 15-20 cm from the skin and keep it moving; use your free hand to lift the coat so air reaches the skin. For noise-sensitive dogs, start with the dryer off, let them sniff it, then turn it on at a distance. If a dog never tolerates a dryer, use a microfiber towel and air dry in a warm, draught-free room, then brush once dry.
Post-Bath Checks
After drying, check the ears; trapped moisture causes otitis. Wipe the visible ear canal with a dry cotton ball to absorb water. For dogs that swim or have pendulous ears, consider a vet-approved drying solution. Finally, brush the fully dry coat once more to remove loose hair and restore its natural lay.
How to Trim Dog Nails Safely
Nail trimming is the task most owners avoid, yet overgrown nails alter gait, strain joints, and can lead to splayed feet or torn nails. Doing it safely requires understanding the anatomy, choosing the right tool, and building tolerance gradually.
Understanding the Quick
The quick is the living tissue inside the nail containing blood vessels and nerves; cutting it is painful and causes bleeding. It is visible as a pinkish area on light nails but invisible on dark nails, making dark-nailed dogs higher risk.
For dark nails, take off thin slices, 1-2 mm at a time, examining the cut surface. As you approach the quick, the centre changes from hollow and chalky to a small, dark dot; stop immediately. For white nails, cut 2-3 mm below the visible pink area.
Choosing Your Tool
Two main tool types exist: guillotine clippers, precise for small to medium dogs, and scissor-style clippers with compound action for larger breeds. Both must be sharp, dull blades crush rather than cut, causing pain and splitting. A nail grinder files gradually and virtually eliminates quick cuts, suiting anxious dogs or those with very dark nails.
The Trimming Process
Handle your dog's paws regularly for several days before trimming. Touch each toe, press gently on the pad to extend the nail, and reward with a treat. This desensitisation is the foundation of a stress-free trim.
Work in a well-lit area. Hold the paw firmly, extend one nail at a time, position clippers perpendicular, and make a single decisive cut; avoid sawing. For nervous dogs, cut one or two nails per session for the first few weeks, ending with a high-value treat, then extend gradually.
What to Do If You Cut the Quick
Nicks happen; stay calm, as your dog reacts to your stress more than the pain. Apply styptic powder or pencil with gentle pressure for 30-60 seconds. Cornflour or a bar of soap works as a temporary stopgap. Do not bathe the dog for 24 hours; if bleeding continues beyond five minutes, contact your vet.
Troubleshooting Common Problems
- Nail splits or cracks: File the rough edge smooth with a nail file or grinder to prevent further tearing. If the split extends into the quick, seek veterinary advice.
- Dog pulls paw away constantly: Stop and return to desensitisation. Forcing the issue reinforces fear. Try having a second person offer treats while you trim.
- Nails are black and you cannot see the quick: Use a grinder instead of clippers, the slower removal rate gives you more control. Alternatively, ask your vet or a professional groomer to demonstrate the correct angle on your dog's nails once, then replicate it at home.
- Dog's dewclaws are overgrown: Dewclaws do not touch the ground and do not wear down naturally. They require regular trimming and can grow in a curve that embeds into the skin if neglected. Check them every time you trim the other nails.
When to Defer to a Professional
For extremely thick, black nails or repeated bleeding incidents, have a professional groomer or vet demonstrate once. Watching them handle your dog's nail type builds confidence. Dogs with severe anxiety may benefit from a vet-prescribed sedative for early sessions, under veterinary supervision only.
Step 4: Clean Ears, Eyes, and Paws
Regular ear cleaning prevents infections, especially in floppy-eared breeds that trap moisture. Wipe the visible part of the ear with cotton wool dampened with a vet-approved ear cleaner, and never push anything into the ear canal. Check eyes daily for discharge and gently wipe away crusts with a damp cloth, working from the inner corner outward. Paw care matters more than most owners realise: trim the hair between the paw pads so it does not trap dirt or form mats, and inspect pads for cracks, foreign objects, or redness after walks. This is also the moment to check for ticks, particularly in long-haired breeds where they hide easily. The RSPCA guidance on dog grooming and welfare emphasises that regular handling of paws and ears builds tolerance and makes vet visits less stressful.
Dog Grooming Frequency by Breed
Grooming frequency depends on coat type. Short-haired breeds like Labradors need a weekly brush and occasional bath. Double-coated breeds shed heavily twice a year, needing daily brushing then. Long-haired breeds like Shih Tzus and Poodles require near-daily brushing plus professional trims every six to eight weeks. Wire-haired terriers benefit from hand-stripping a few times yearly. Adjust seasonally: more brushing in spring and autumn, extra paw checks in winter. A consistent schedule keeps skin healthy and reduces hair in your home.
Common Mistakes and How to Avoid Them
The most common error is rushing; break grooming into short, positive sessions. Other frequent mistakes include using the wrong brush for the coat type, skipping detangling before bathing (water tightens mats into knots requiring shaving), and neglecting tool maintenance. Wash brushes monthly in warm soapy water and replace clipper blades when they snag.
Desensitisation training solves most behavioural problems. Introduce each tool slowly, let your dog sniff it, and reward calm behaviour before you even touch them with it. Pair every step with high-value treats so your dog learns that grooming predicts good things. For anxious dogs, start with three-minute sessions and gradually extend them over several weeks. The PDSA advice on handling and grooming anxious pets recommends building tolerance through short, repeated exposure rather than forcing the issue. If your dog shows persistent signs of stress, such as lip licking, yawning, or whale eye, stop and try again later. For coat conditions you cannot resolve at home, such as severe matting or skin irritation, consult a professional groomer or vet. On the hygiene front, always clean your tools between dogs and wash your hands after handling an unfamiliar animal.
Grooming your dog at home is a learned skill, and the learning curve is smoother with equipment that does not fight you. Quanolo's curated pet care range, including the Pups Furry Dog Brush and FreshGroom Pet Comb, is designed to make detangling and shedding control genuinely easier, with thoughtful features that respect your dog's comfort. The British Veterinary Association guidance on routine pet care reinforces that regular home grooming supports dermatological health and strengthens the human-animal bond. Shop now and give your dog a grooming routine that works for both of you.

Frequently Asked Questions
How do you groom a dog at home for beginners?
Start by gathering essential tools: a brush suited to your dog's coat, dog-safe shampoo, towels, and nail clippers. Begin with a thorough brushing to remove mats and loose fur. Then, bathe your dog using lukewarm water, rinse well, and dry thoroughly. Finish by trimming nails carefully and cleaning ears. Keep sessions short and positive with treats to build your dog's confidence.
What are the most common dog grooming mistakes to avoid?
Common mistakes include using human shampoo, which disrupts a dog's skin pH, and rushing the drying process, which can lead to skin irritation. Cutting nails too short is another frequent error; trim small amounts at a time. Avoid pulling at mats, as this hurts your dog. Always use blunt-ended shears away from the face and ensure your tools are clean.
How often should you groom your dog at home?
Grooming frequency depends on coat type. Short-haired breeds may only need weekly brushing, while long-haired or double-coated breeds benefit from brushing several times a week to prevent mats. Nails should be trimmed every 3-4 weeks. Bathing is typically recommended every 4-8 weeks, but adjust based on your dog's activity level and skin condition.
How do I keep my dog calm during grooming?
Introduce grooming tools gradually and pair them with high-value treats. Start with short, positive sessions, touching paws and ears without tools first. Use a non-slip mat for stability and speak in a calm, reassuring voice. If your dog shows signs of stress, stop and try again later. Regular, consistent handling helps reduce anxiety over time.