


Table of Contents
- Identify Your Hinge Type and the Problem
- Tools Needed for Cabinet Door Repair
- Step 1: Tighten the Hinge Screws
- Step 2: Cabinet Hinge Adjustment Guide
- How to Repair Stripped Screw Holes in Wood
- Troubleshooting Sagging Cabinet Doors
- Preventing Future Loose Hinges
- Frequently Asked Questions
Last Updated: September 23, 2026
Identify Your Hinge Type and the Problem
Loose cabinet hinges are one of the most common household issues, and learning how to fix loose cabinet hinges is almost always straightforward with basic tools. Understanding your hinge type makes the repair simpler.
Cabinet hinges come in three main types: Concealed hinges (hidden inside), Face frame hinges (mounted on the visible frame), and European hinges (adjustable, inside the box). Identify yours by opening the door and looking at the connection point.
The problem usually falls into one of these categories:
- The door sags or hangs unevenly
- Screws are visibly loose or won't tighten
- The door rubs against the cabinet frame
- Hinges creak or make noise when opening
Most loose hinges result from wood shrinkage or screws loosening from repeated use. The fix depends on the specific problem.
Tools Needed for Cabinet Door Repair
The right tools make the job faster and prevent damage. What you need depends on your cabinet material and hinge type.
Essential tools:
- Screwdriver (Phillips or flat-head), Match the screw head exactly; a loose fit strips the head. Cabinet hinges typically use Phillips #2 or flat-head sizes.
- Adjustable wrench or hex key set, European hinges use hex screws (typically 2-3 mm); check your hinge before buying.
- Measuring tape, Check door alignment by measuring gaps between door and frame; gaps should be even (typically 2-3 mm).
- Pencil for marking, Mark screw positions before drilling to avoid misalignment.
Optional but highly recommended:
- Cordless drill with bits, Speeds up pilot hole drilling and screw removal. A 2 mm pilot bit works for most cabinet hinge screws.
- Wood glue, Required for toothpick and dowel repairs. Standard PVA wood glue works for both solid wood and particle board.
- Wooden toothpicks or dowels, For stripped holes. Toothpicks work for small holes in solid wood; dowels (6-8 mm) suit larger holes or particle board.
- Shim (plastic or wood wedge), Adjusts door angle without removing the hinge. Plastic shims (2-3 mm) are easier to position.
- Utility blade, Trims excess toothpick or dowel flush with the surface after glue dries.
- Spirit level, Checks if the door hangs straight. A small torpedo level is ideal for cabinet work.
- Screw anchors or threaded inserts, Critical for particle board cabinets. Plastic anchors (size 8-10) or metal threaded inserts prevent screws from stripping again.
Material-specific considerations:
If your cabinet is solid wood, toothpicks and wood glue are your first choice for stripped holes. Solid wood holds repairs well.
If your cabinet is particle board or MDF, skip toothpicks for larger holes. Particle board compresses easily and won't grip reliably after one repair. Use a threaded insert or plastic anchor instead; these create a permanent gripping surface.
Hinge-type tool notes:
- Concealed hinges, Require a hex key (usually 3-4 mm) for adjustment screws. Check your hinge packaging for the size.
- Face frame hinges, Use standard Phillips or flat-head screws; no special tools needed unless shimming.
- European hinges, May have an adjustment cam that turns by hand; a hex key speeds adjustment.
A drill saves time but isn't essential for basic tightening or toothpick repairs.
Step 1: Tighten the Hinge Screws
Start with the simplest fix: tightening the screws that are already there.
Open the cabinet door fully. Using your screwdriver, turn each screw clockwise until snug, then give it a quarter turn more.
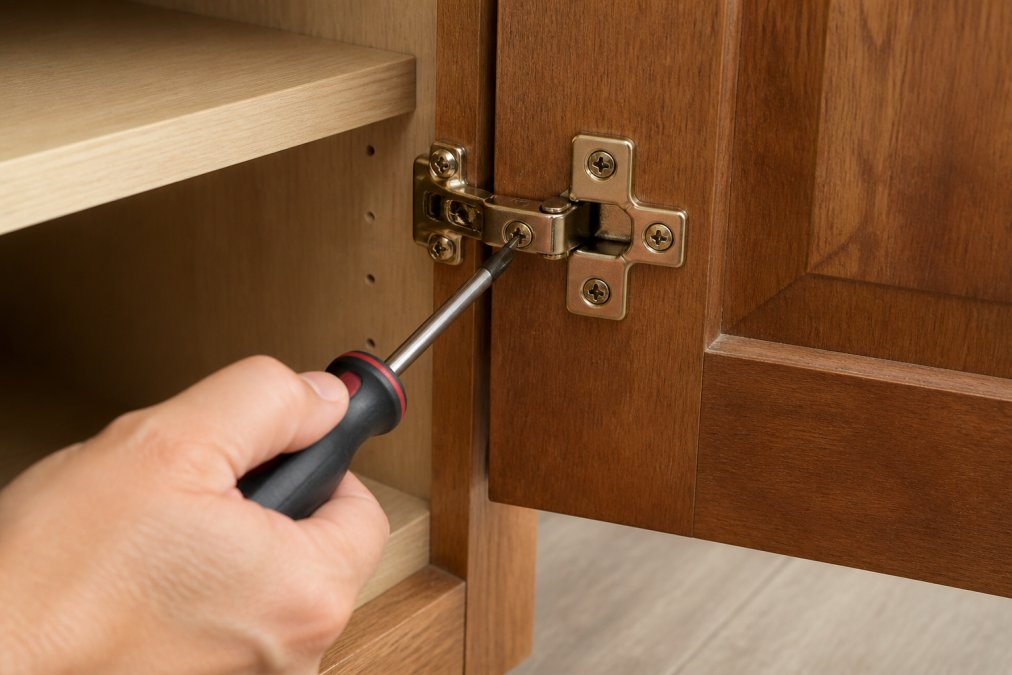
Close the door and check alignment. If it sits flush, you're done. If it sags or sticks, move to the next step.
Why this works: Screws loosen naturally from vibration and wood movement. A quarter turn often restores grip.
What to watch for: If a screw spins freely, the hole is stripped. Stop and move to the stripped screw repair section.
Step 2: Cabinet Hinge Adjustment Guide
If tightening didn't fix it, the hinge may need adjustment. Most concealed and European hinges have built-in adjustment screws for depth, side-to-side, and angle. Turn adjustment screws a quarter turn at a time, checking fit after each change.
Common scenarios: Door sags at bottom (tighten depth screw on top hinge); door pulls away (tighten side-to-side screw); door rubs at top (adjust angle screw on bottom hinge).
Face frame hinges have less adjustment range. If alignment fails, shim the hinge or move the mounting plate slightly.
How to Repair Stripped Screw Holes in Wood
Stripped screw holes are the real headache. The wood is damaged and the screw won't grip anymore. You have three repair options, each with different success rates depending on your cabinet material and hole size.
Option 1: Toothpicks and wood glue (best for small holes in solid wood)
Break wooden toothpicks into pieces and coat lightly with PVA wood glue. Push into the stripped hole until packed full. Let dry 2 hours, trim excess with a utility blade, drill a new pilot hole, and install a fresh screw.
When it works: Solid wood cabinets, holes smaller than 4 mm.
When it fails: Particle board or MDF (toothpicks compress and holes strip again within months). Holes larger than 5 mm. High-use cabinets with frequent removal.
Durability: 2-3 years for solid wood if the cabinet is used normally. Particle board repairs fail within weeks.
Option 2: Wooden dowel (best for larger holes in solid wood)
Drill out the hole to 8-10 mm, cut a dowel to fit snugly, coat with wood glue, and tap in with a hammer until flush. Once dry (2 hours), drill a new pilot hole for your screw.
When it works: Solid wood cabinets, holes larger than 5 mm, when you want a repair that lasts longer than toothpicks.
When it fails: Particle board (dowels compress just like toothpicks). Holes near the edge of the cabinet frame (drilling larger can weaken the structure).
Durability: 5-10 years for solid wood. The dowel creates a much larger gripping surface than toothpicks and holds up to repeated removal and reinstallation.
Option 3: Threaded insert or plastic anchor (best for particle board and MDF)
This is the only reliable repair for flat-pack and budget cabinets. For a threaded insert: drill out the hole to the size specified by the insert (usually 8-10 mm), tap the insert into place with a hammer, then screw your hinge screw into the insert. For a plastic anchor: drill a hole slightly smaller than the anchor, push the anchor in, and screw directly into it.
When it works: Particle board, MDF, and engineered wood (the insert or anchor creates a permanent gripping surface that won't compress).
Comparison table:
| Method | Solid Wood | Particle Board | Cost | Time | Durability | Removable |
|---|---|---|---|---|---|---|
| Toothpicks | ✓ Good | ✗ Poor | £0-2 | 10 min | 2-3 years | No |
| Dowel | ✓ Very Good | ✗ Poor | £2-5 | 20 min | 5-10 years | Yes |
| Insert/Anchor | ✓ Good | ✓ Excellent | £3-8 | 15 min | 10+ years | Yes |
How to choose:
- Identify your cabinet material. Open a cabinet door and look at the edge or inside surface. Solid wood has visible grain and is heavy. Particle board or MDF looks uniform, is lighter, and may have a plastic edge banding.
- Measure the stripped hole. If it's smaller than 4 mm, toothpicks work. If it's 4-6 mm, a dowel is better. If it's larger than 6 mm or in particle board, use an insert.
- Consider future maintenance. If you think you'll remove and reinstall the hinge (for cleaning or replacement), use a dowel or insert. Toothpick repairs don't survive removal.
Pro tip: If a hole has been stripped more than once, the surrounding wood is likely damaged. Drill out a larger hole, use a dowel or insert, and move the hinge mounting plate slightly if possible. Reusing the exact same hole often leads to repeated failures.
Troubleshooting Sagging Cabinet Doors
A sagging door is usually caused by loose hinges or worn screws, but sometimes it's more complex. Here's how to diagnose and fix it.
Preventing Future Loose Hinges
After you fix loose cabinet hinges, keep them tight with simple maintenance.
Frequently Asked Questions
Can a loose hinge be tightened with a toothpick?
Yes. If the screw hole is stripped and screws no longer grip, insert wooden toothpicks or matchsticks into the hole alongside the fastener, then tighten. The wood fibres from the toothpicks fill the gap and give the screw purchase. This works best for minor looseness; severely stripped holes may need dowels or wood filler instead.
How do I tighten a cabinet hinge that keeps coming loose?
First, tighten all hinge screws firmly using the correct screwdriver size to avoid stripping. If it keeps loosening, the hole is likely stripped. Use wood glue and toothpicks, a wooden dowel, or epoxy wood filler to restore grip. After repair, apply a small amount of thread-locking compound to the screw to prevent it from vibrating loose again.
Why do my cabinet hinges keep pulling away from the wood?
Hinges pull away when fasteners lose grip in enlarged or stripped screw holes. This happens from repeated tightening, vibration, or poor initial installation into soft particle board. Check the cabinet material; particle board strips more easily than solid wood. Repair using toothpicks and glue, or upgrade to larger-diameter fasteners with washers to distribute load across a wider area.
Do I need to replace the entire hinge if the screw hole is stripped?
Not always. Minor stripping can be fixed with toothpicks, wood glue, or wooden dowels inserted into the hole before re-screwing. If the hinge itself is bent or damaged, replacement is needed. If multiple holes are severely stripped or the mounting plate is cracked, replacing the entire hinge is more reliable than repair. Test the repair first; if it fails within a few weeks, replacement is the better choice.